


반응형
Overview
이전 포스팅과 연결되는 내용입니다.
이 포스팅은 image_picker를 활영하여 이미지를 앱에 호출하였다는 전제하에 이미지 자르기, 회전하기를 설명합니다.
image_picker 라이브러리 추가와 설정 방법은 이 포스팅에서 설명하지 않습니다.
image_picker에 대한 포스팅은 아래에서 확인 가능합니다.
이번 포스팅에서는...
- image_cropper 라이브러리를 활용하여
- 불러온 이미지를 확대/축소 또는 자르기, 회전하기
하는 것을 다룹니다.
포스팅에서 다루는 프로젝트 코드는 아래의 깃허브에서 다운로드 받으실 수 있습니다.
https://github.com/luvris2/flutter-example/tree/main/flutter_camera_gallery_image_crop_test
immage_cropper 라이브러리 선택 이유
이미지 자르기 혹은 회전을 위해 현재 pub.dev 에서 가장 좋아요 수가 많은(most likes) 이미지 자르기 관련 라이브러리로 선택하여 포스팅을 작성하였습니다.
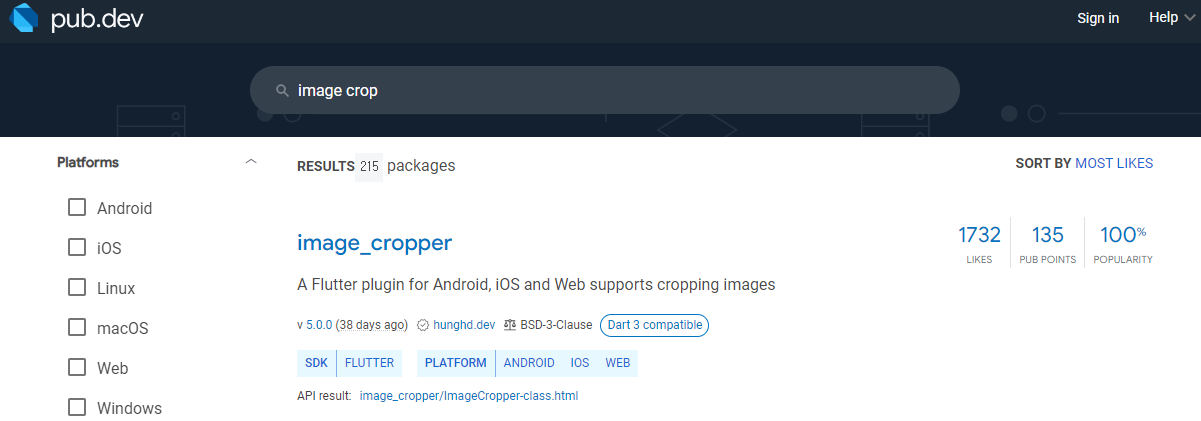
image_cropper
- 이미지 자르기를 지원하는 Android, iOS 및 웹용 플러터 플러그인
- 세 개의 서로 다른 네이티브 라이브러리를 기반으로 하므로 플랫폼 간 서로 다른 UI 제공
- Android : uCrop 라이브러리 사용
- iOS : TOCropViewController 라이브러리 사용
- Web : Croppie 라이브러리 사용
라이브러리(종속성) 추가
- 터미널에 아래의 명령어 입력
flutter pub add image_cropper이미지 크로퍼 사용을 위한 플랫폼 설정
iOS
- 설정을 따로 필요로 하지 않습니다.
Android
- (프로젝트 디렉토리 내에서) android - app - src - main - AndroidManifest.xml
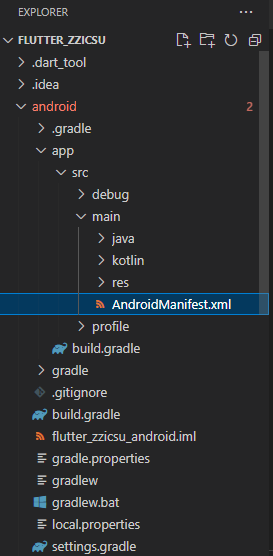
- 안드로이드 매니페스트 파일(AndroidManifest.xml)에 Ucrop 액티비티 추가
<!-- AndroidManifest.xml -->
<activity
    android:name="com.yalantis.ucrop.UCropActivity"
    android:screenOrientation="portrait"
    android:theme="@style/Theme.AppCompat.Light.NoActionBar"/>
- 코드 추가 화면

Web
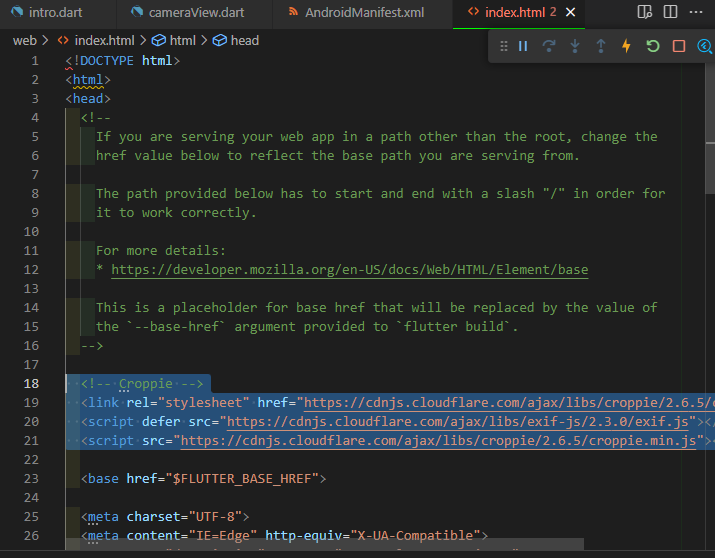
- (프로젝트 디렉토리 내에서) web - index.html
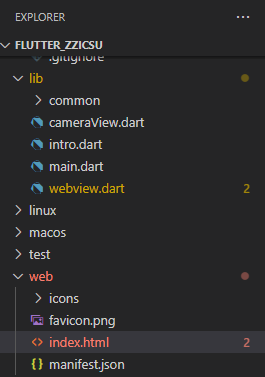
- 인덱스 파일(index.html)의 헤드 부분에 아래의 코드 추가
<head>
  ....

  <!-- Croppie -->
  <link rel="stylesheet" href="https://cdnjs.cloudflare.com/ajax/libs/croppie/2.6.5/croppie.css" />
  <script defer src="https://cdnjs.cloudflare.com/ajax/libs/exif-js/2.3.0/exif.js"></script>
  <script src="https://cdnjs.cloudflare.com/ajax/libs/croppie/2.6.5/croppie.min.js"></script>

  ....
</head>
- 코드 추가 화면
예제
- 아래의 예제는 flutter image_cropper 공식 문서에서 발췌한 내용입니다.
import 'package:image_cropper/image_cropper.dart';

CroppedFile croppedFile = await ImageCropper().cropImage(
      sourcePath: imageFile.path,
      aspectRatioPresets: [
        CropAspectRatioPreset.square,
        CropAspectRatioPreset.ratio3x2,
        CropAspectRatioPreset.original,
        CropAspectRatioPreset.ratio4x3,
        CropAspectRatioPreset.ratio16x9
      ],
      uiSettings: [
        AndroidUiSettings(
            toolbarTitle: 'Cropper',
            toolbarColor: Colors.deepOrange,
            toolbarWidgetColor: Colors.white,
            initAspectRatio: CropAspectRatioPreset.original,
            lockAspectRatio: false),
        IOSUiSettings(
          title: 'Cropper',
        ),
        WebUiSettings(
          context: context,
        ),
      ],
    );
코딩
파일 생성 및 기본 설정
이전의 포스팅과 이어지는 내용입니다.
이미지를 자르고 회전하는 것을 목적으로 설명하는 포스팅이기 때문에 이미지를 불러오는 내용은 생략합니다.
해당 내용은 이전 포스팅에서 확인 가능합니다.
- image_cropper 사용을 위해 최상단에 라이브러리 호출
import 'package:image_cropper/image_cropper.dart';UI 디자인
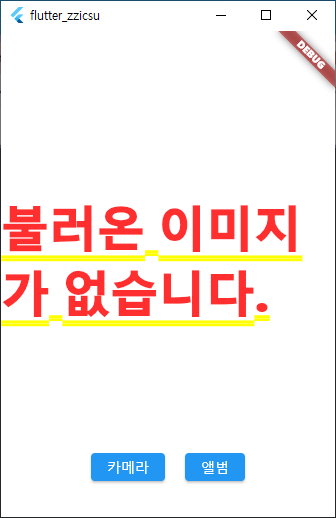
- 이미지를 자르고 회전하기 위해 위와 같은 화면을 구성합니다.
  @override
  Widget build(BuildContext context) {
    return SafeArea(
      child: Container(
        color: Colors.white,
        child: Center(
          child: Column(
            mainAxisAlignment: MainAxisAlignment.center,
            children: [
              SizedBox(
                width: MediaQuery.of(context).size.width, // 전체 가로 영역
                height: MediaQuery.of(context).size.height - 100, // 전체 세로 영역에서 100을 뺀 영역
                child: _buildPhotoArea(), // 이미지 표시 영역 위젯
              ),
              Row(
                mainAxisAlignment: MainAxisAlignment.center,
                children: [
                  // 카메라 선택 버튼
                  ElevatedButton(
                    onPressed: () {
                      getImage(ImageSource.camera);
                    },
                    child: const Text("카메라"),
                  ),
                  const Padding(padding: EdgeInsets.all(10)),
                  // 앨범 선택 버튼
                  ElevatedButton(
                    onPressed: () {
                      getImage(ImageSource.gallery);
                    },
                    child: const Text("앨범"),
                  ),
                ],
              )
            ],
          ),
        ),
      ),
    );
  }
- 이미지를 보여주기 위한 위젯 정의
  // 카메라 혹은 갤러리의 이미지를 표현해주는 영역
  Widget _buildPhotoArea() {
    // 불러온 이미지가 있는지 없는지 확인
    return _imageFile != null
        // 불러온 이미지가 있으면 출력
        ? Center(
            child: Image.file(
              File(_croppedFile!.path), // 크롭된 이미지가 존재하면 앱에 표시
            ),
          )
        // 불러온 이미지가 없으면 텍스트 출력
        : const Center(
            child: Text("불러온 이미지가 없습니다."),
          );
  }
기능 구현
- 이미지를 저장할 변수 정의
  // Image Picker 인스턴스 생성
  final ImagePicker picker = ImagePicker();

  // 카메라 또는 갤러리의 이미지를 저장할 변수
  XFile? _imageFile;

  // 자르거나 회전한 이미지를 저장할 변수
  CroppedFile? _croppedFile;
- image_picker를 통해 이미지를 가져오는 함수 정의
- 이미지를 가져오고 이미지 자르기/회전하기를 위해 다른 함수 호출
  // 이미지를 가져오는 함수
  Future<void> getImage(ImageSource imageSource) async {
    try {
      // 카메라 또는 갤러리의 이미지
      final XFile? imageFile = await picker.pickImage(source: imageSource);

      if (imageFile != null) {
        _imageFile = imageFile;
        // 가져온 이미지를 자르거나 회전하기 위한 함수 호출
        cropImage();
      }
    } catch (e) {
      print("디버깅용 이미지 호출 에러 : $e");
    }
  }
- 이미지를 자르거나 회전하기 위한 함수 정의
  // 이미지를 자르거나 회전하는 함수
  Future<void> cropImage() async {
    if (_imageFile != null) {
      final croppedFile = await ImageCropper().cropImage(
        sourcePath: _imageFile!.path, // 사용할 이미지 경로
        compressFormat: ImageCompressFormat.jpg, // 저장할 이미지 확장자(jpg/png)
        compressQuality: 100, // 저장할 이미지의 퀄리티
        uiSettings: [
          // 안드로이드 UI 설정
          AndroidUiSettings(
              toolbarTitle: '이미지 자르기/회전하기', // 타이틀바 제목
              toolbarColor: Colors.deepOrange, // 타이틀바 배경색
              toolbarWidgetColor: Colors.white, // 타이틀바 단추색
              initAspectRatio:
                  CropAspectRatioPreset.original, // 이미지 크로퍼 시작 시 원하는 가로 세로 비율
              lockAspectRatio: false), // 고정 값으로 자르기 (기본값 : 사용안함)
          // iOS UI 설정
          IOSUiSettings(
            title: '이미지 자르기/회전하기', // 보기 컨트롤러의 맨 위에 나타나는 제목
          ),
          // Web UI 설정
          WebUiSettings(
            context: context, // 현재 빌드 컨텍스트
            presentStyle: CropperPresentStyle.dialog, // 대화 상자 스타일
            boundary: // 크로퍼의 외부 컨테이너 (기본값 : 폭 500, 높이 500)
                const CroppieBoundary(
              width: 520,
              height: 520,
            ),
            viewPort: // 이미지가 보이는 부분 (기본값 : 폭 400, 높이 400, 유형 사각형)
                const CroppieViewPort(width: 480, height: 480, type: 'circle'),
            enableExif: true, // 디지털 카메라 이미지 파일 확장자 사용
            enableZoom: true, // 확대/축소 기능 활성화 (기본값 : false)
            showZoomer: true, // 확대/축소 슬라이더 표시/숨김 (기본값 : true)
          ),
        ],
      );

      if (croppedFile != null) {
        // 자르거나 회전한 이미지를 앱에 출력하기 위해 앱의 상태 변경
        setState(() {
          _croppedFile = croppedFile;
        });
      }
    }
전체 소스 코드
main.dart
import 'package:flutter/material.dart';
import 'package:flutter_camera_gallery_image_crop_test/cameraView.dart';

void main() {
  runApp(
    const MaterialApp(
      home: CameraView(),
    ),
  );
}
cameraView.dart
import 'dart:io';
import 'package:flutter/material.dart';
import 'package:image_cropper/image_cropper.dart';
import 'package:image_picker/image_picker.dart';

class CameraView extends StatefulWidget {
  const CameraView({super.key});

  @override
  State<CameraView> createState() => _CameraViewState();
}

class _CameraViewState extends State<CameraView> {
  // Image Picker 인스턴스 생성
  final ImagePicker picker = ImagePicker();

  // 카메라 또는 갤러리의 이미지를 저장할 변수
  XFile? _imageFile;

  // 자르거나 회전한 이미지를 저장할 변수
  CroppedFile? _croppedFile;

  // 이미지를 가져오는 함수
  Future<void> getImage(ImageSource imageSource) async {
    try {
      // 카메라 또는 갤러리의 이미지
      final XFile? imageFile = await picker.pickImage(source: imageSource);

      if (imageFile != null) {
        _imageFile = imageFile;
        // 가져온 이미지를 자르거나 회전하기 위한 함수 호출
        cropImage();
      }
    } catch (e) {
      print("디버깅용 이미지 호출 에러 : $e");
    }
  }

  // 이미지를 자르거나 회전하는 함수
  Future<void> cropImage() async {
    if (_imageFile != null) {
      final croppedFile = await ImageCropper().cropImage(
        sourcePath: _imageFile!.path, // 사용할 이미지 경로
        compressFormat: ImageCompressFormat.jpg, // 저장할 이미지 확장자(jpg/png)
        compressQuality: 100, // 저장할 이미지의 퀄리티
        uiSettings: [
          // 안드로이드 UI 설정
          AndroidUiSettings(
              toolbarTitle: '이미지 자르기/회전하기', // 타이틀바 제목
              toolbarColor: Colors.deepOrange, // 타이틀바 배경색
              toolbarWidgetColor: Colors.white, // 타이틀바 단추색
              initAspectRatio:
                  CropAspectRatioPreset.original, // 이미지 크로퍼 시작 시 원하는 가로 세로 비율
              lockAspectRatio: false), // 고정 값으로 자르기 (기본값 : 사용안함)
          // iOS UI 설정
          IOSUiSettings(
            title: '이미지 자르기/회전하기', // 보기 컨트롤러의 맨 위에 나타나는 제목
          ),
          // Web UI 설정
          WebUiSettings(
            context: context, // 현재 빌드 컨텍스트
            presentStyle: CropperPresentStyle.dialog, // 대화 상자 스타일
            boundary: // 크로퍼의 외부 컨테이너 (기본값 : 폭 500, 높이 500)
                const CroppieBoundary(
              width: 520,
              height: 520,
            ),
            viewPort: // 이미지가 보이는 부분 (기본값 : 폭 400, 높이 400, 유형 사각형)
                const CroppieViewPort(width: 480, height: 480, type: 'circle'),
            enableExif: true, // 디지털 카메라 이미지 파일 확장자 사용
            enableZoom: true, // 확대/축소 기능 활성화 (기본값 : false)
            showZoomer: true, // 확대/축소 슬라이더 표시/숨김 (기본값 : true)
          ),
        ],
      );

      if (croppedFile != null) {
        // 자르거나 회전한 이미지를 앱에 출력하기 위해 앱의 상태 변경
        setState(() {
          _croppedFile = croppedFile;
        });
      }
    }
  }

  @override
  Widget build(BuildContext context) {
    return SafeArea(
      child: Container(
        color: Colors.white,
        child: Center(
          child: Column(
            mainAxisAlignment: MainAxisAlignment.center,
            children: [
              SizedBox(
                width: MediaQuery.of(context).size.width,
                height: MediaQuery.of(context).size.height - 100,
                child: _buildPhotoArea(), // 이미지 표시 영역 위젯
              ),
              Row(
                mainAxisAlignment: MainAxisAlignment.center,
                children: [
                  // 카메라 선택 버튼
                  ElevatedButton(
                    onPressed: () {
                      getImage(ImageSource.camera);
                    },
                    child: const Text("카메라"),
                  ),
                  const Padding(padding: EdgeInsets.all(10)),
                  // 앨범 선택 버튼
                  ElevatedButton(
                    onPressed: () {
                      getImage(ImageSource.gallery);
                    },
                    child: const Text("앨범"),
                  ),
                ],
              )
            ],
          ),
        ),
      ),
    );
  }

  // 카메라 혹은 갤러리의 이미지를 표현해주는 영역
  Widget _buildPhotoArea() {
    // 불러온 이미지가 있는지 없는지 확인
    return _imageFile != null
        // 불러온 이미지가 있으면 출력
        ? Center(
            child: Image.file(
              File(_croppedFile!.path),
            ),
          )
        // 불러온 이미지가 없으면 텍스트 출력
        : const Center(
            child: Text("불러온 이미지가 없습니다."),
          );
  }
}
참고
반응형